구글 단축 URL API 사용방법 (Javascript)
구글에서 제공하는 단축URL API를 이용하여 자바스크립트에서 사용해보자. 먼저 구글에 개발자로 등록이 되어야 한다.
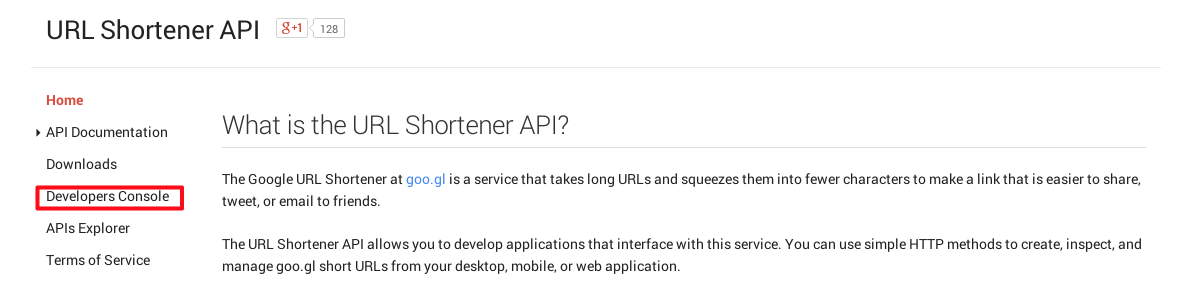
단축URL페이지로 이동한다.
1. 구글개발자에서 단축URL 등록페이지로 이동한다.
https://developers.google.com/url-shortener/ 여기서 Developers console로 선택한다.
그리고 본인의 프로젝트를 하나 만든다. api를 사용할 프로젝트로 보면 된다.
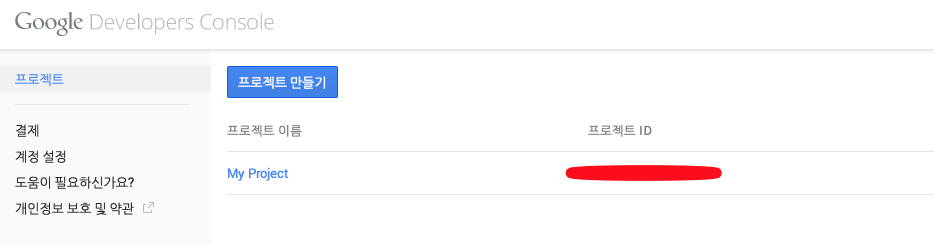
프로젝트를 등록했으면 해당 프로젝트를 클릭하여 들어간다.
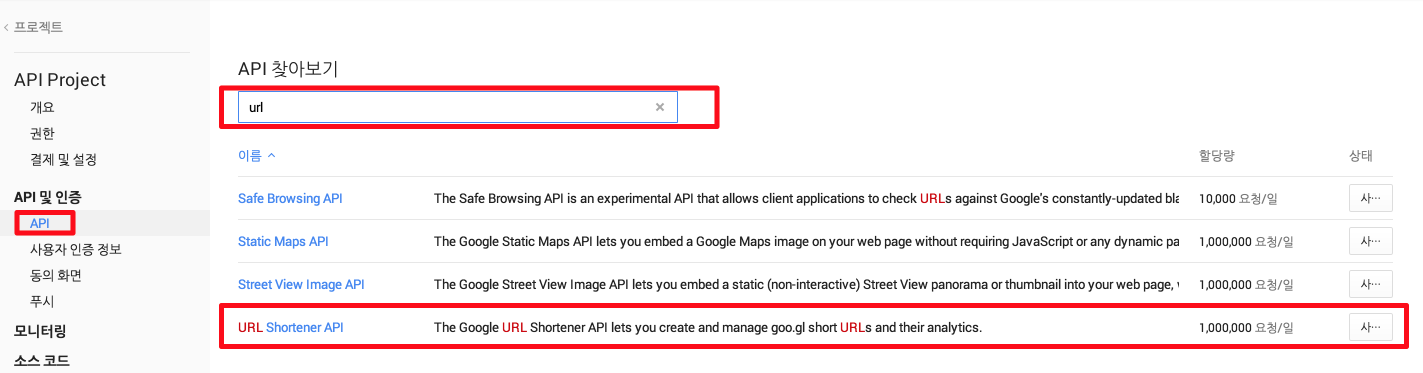
API 및 인증을 선택하고 API 찾아보기에서 URL를 입력하면 URL관련된 API가 나오고 여기서 마지막 URL Shortener API에서 사용버튼을 클릭하면 동의를 구하는 창이 나온다. 동의하고 나서 보면 API메뉴에 자신이 등록한 API가 표시된다.
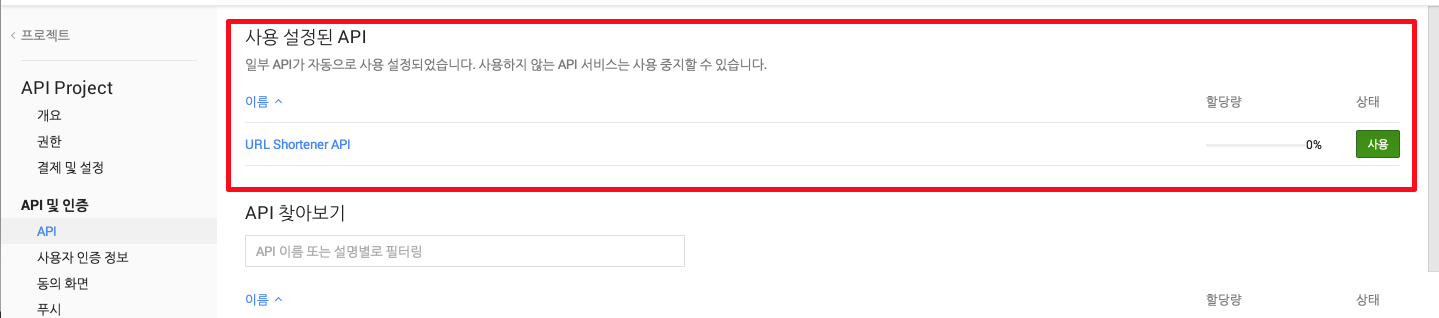
단축URL 사용은 일일 1,000,000건 정도로 제한된다. 이제 사용자인증정보를 등록해야 한다. 좌측메뉴의 API 및 인증에서 사용자인증정보를 선택하면 두가지 정보가 나온다.
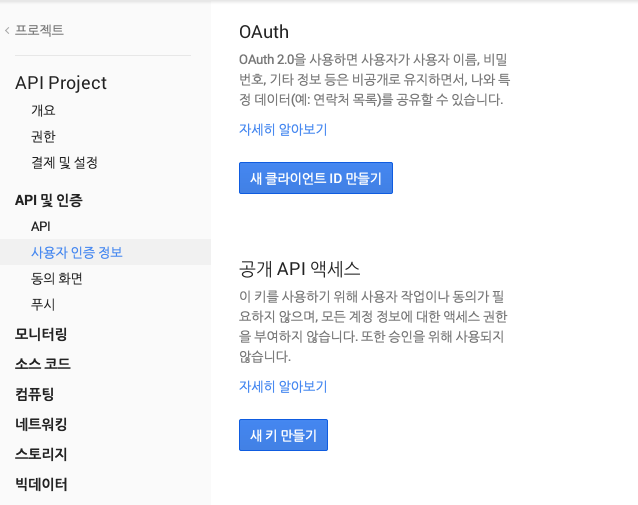
각각의 용도 맞게 선택하면 된되 여기서는 공개 API액세스를 이용한다. 새 키 만들기를 선택하면 다시 선택할 키가 메시지 박스로 보인다.
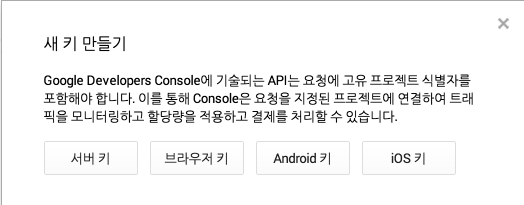
역시 용도에 맞게 선택한다. 각 버튼을 클릭하면 자세한 설명이 나온다. 서버키는 서버에만 등록되고, 브라우저 키는 배포용 클라이언트 프로그램을 만들때 사용하면 된다. 여기서는 브라우저키를 사용한다.
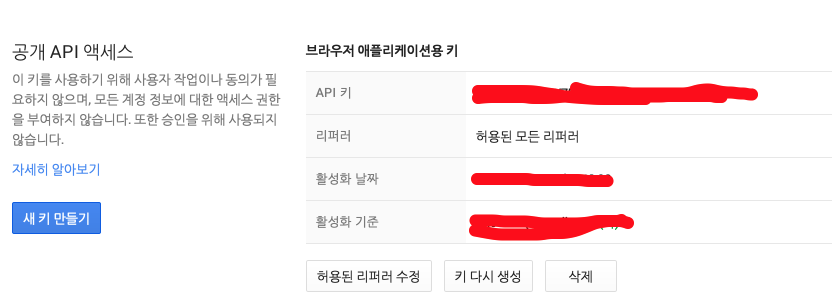
API키가 생성되면 그것을 가지고 이제 코딩을 하면 된다.
2. 구글 API 스크립트를 등록한다.
// JavaScript Code
/**
 * 단축url 키등록
 */
function load() {
    gapi.client.setApiKey("등록된 키값");
    gapi.client.load("urlshortener", "v1", function () {});
}
스크립트에 등록된 load함수를 통해 api사용키가 클라이언트에 등록된다. gapi.client.setApiKey에 위에서 생성한 키를 등록하면 된다.
3. 단축URL를 생성되는 로직을 작성한다.
var request = gapi.client.urlshortener.url.insert({
    resource: {
        longUrl: longURL,
    },
});
request.execute(function (response) {
    if (response.id != null) {
        console.log(response.id);
    } else {
        console.log("error: creating short url");
    }
});
gapi.client.urlshortener.url.insert의 생성메소들 통해서 longURL에 URL를 단축할 긴주소를 입력받는다.
그리고 request.execute로 실행이 되면서 response.id에 실제 단축된 주소가 나온다.
마지막으로 아래 스크립트를 html하단에 기재한다.
<script src="https://apis.google.com/js/client.js?onload=load"></script>
아래는 최종 샘플소스이다.
<!DOCTYPE html>
<html lang="en">
    <head>
        <meta charset="UTF-8" />
        <title>Document</title>
        <script src="//code.jquery.com/jquery-1.11.0.min.js"></script>
    </head>
    <body>
        <input type="text" id="longURL" /><button id="makeShortURL">
            단축URL생성</button
        ><br />
        <input type="text" id="shortURL" />
    </body>
    <script>
        /**
         * 단축url 키등록
         */
        function load() {
            gapi.client.setApiKey("등록된 키를 여기에 입력");
            gapi.client.load("urlshortener", "v1", function () {});
        }
        /**
         * 단축 URL생성
         */
        $("#makeShortURL").click(function () {
            var longURL = $("#longURL").val();
            var request = gapi.client.urlshortener.url.insert({
                resource: {
                    longUrl: longURL,
                },
            });
            request.execute(function (response) {
                if (response.id != null) {
                    console.log(response.id);
                    $("#shortURL").val(response.id);
                } else {
                    alert("error: creating short url");
                }
            });
        });
    </script>
    <script src="https://apis.google.com/js/client.js?onload=load"></script>
</html>
참고사이트 : https://developers.google.com/api-client-library/javascript/samples/samples